Pizza Dough Balls
/
What's not to love about these delicious pull apart pizza dough balls. They're fun, they're fluffy, and so family friendly. I'll quite often make them on the weekend for a mid afternoon family snack, or if friends are coming over, they're such a lovely way for people to snack before hitting the dinner table.
They're stuffed...which means you can stuff them with anything. Go vege with simple roast garlic tomato, ricotta and loads of basil, or beef them up with a mix of bacon, salami, gooey mozarella cheese, and a heap of shredded oregano. I love to make garlic pizza balls and serve them with pesto or a simple tomato sauce. I haven't gone into details about the quantities you'll need in the filling, just mix the fillings together, taste and add ingredients to taste.
Pizza Dough Balls
For the dough
- 1 cup warm water
- 2 teaspoons dried yeast
- 1 tablespoon sugar
- 3 tablespoons oil
- 1 teaspoon salt
- 2 and a half cups flour
Fillings................
Beef it up
- tomato sauce
- mozarella
- chopped salami
- chopped and fried bacon
- fresh oregano chopped
- chopped garlic
- salt and pepper to taste
Vege time
- roasted garlic, chopped
- ricotta
- wilted spinach leaves
- chopped basil
- parmesan cheese
- salt and pepper to taste
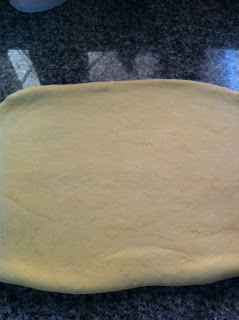
Method
- Combine the water, sugar and yeast, stir and stand for 5 minutes to froth.
- In a bowl, mix flour, oil and salt. Add yeast mixture, mix well and knead for 10 minutes, or pop into a mixer and knead with a dough hook for 5 mins.
- Pop into an oiled bowl and leave in a warm place to rise for 2 hours
- Break the dough into large marble sized pizzas. Press flat into a circle, fill with your choice of toppings, pinch tops together and place upside down into a oven dish.
- Repeat with all the dough, leaving a small gap between each pizza ball.
- Leave to rise for 30 minutes and then top with grated parmesan cheese
- Bake at 400 degrees fahrenheit (200 degrees celcius) for 10 to 15 minutes until well risen, golden brown and cooked through.
- Serve with tomato or pesto dipping sauce and ENJOY!!