Spicy Prawn and Chicken Skewers


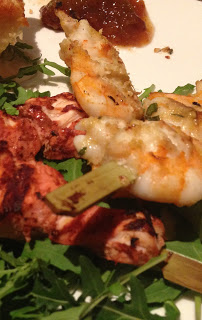
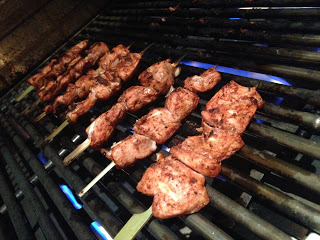
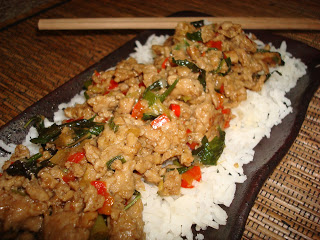
The temperature has dropped over the last week and we're in the sweet spot of outdoor living - which means barbeque time. I get a bit tired of the usual steak, lamb chops and sausages, so this weekend I marinated some chicken and prawns, skewered them and fired up the barbie to give them a lovely smoky flavour. An added benefit to skewers, is that it's a fun way to children to try new food, neither of the little chefs had eaten prawns before this weekend, but were happy to try them on a stick.

Marinades are typically acid and fat based, so in this case I've used coconut cream as the fat component and citrus as the acid, and thrown in some serious flavour from herbs. When marinating prawns, go easy on the citrus and add more just before cooking - adding it too early may cook the prawns before they've even hit the grill (though would make for a nice prawn ceviche). I buy my prawns at Megamart as they're the only supermarket that will devein as well as peel the prawns.
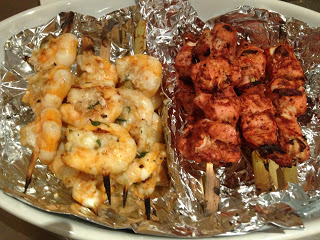
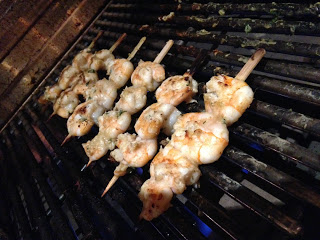

Prawn Skewers

  • 500 grams prawns, peeled and deveined
  • 2 tablespoons green curry paste (Mae Ploy, Thai King, or even better home-made)
  • 1 teaspoon fish sauce
  • 1 clove of garlic, minced
  • small handful of thai basil, shredded
  • 200 mls coconut milk
  • 1 teaspoon grated palm sugar (use brown if you don't have it)
  • juice of a lime
  • 1/2 teaspoon grated kaffir lime rind (or 4 kaffir lime leaves, stem removed and shredded finely)

Method
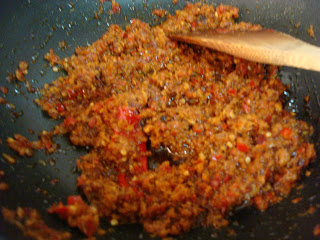
  1. Put all but the lime juice and prawns into a food processor and blitz until well combined and basil is finely minced. Squeeze in half the lime juice
  2. Marinate the prawns in the mixture for at least an hour and up to 3 hours, stirring occasionally. Add in the juice of the remaining half lime.
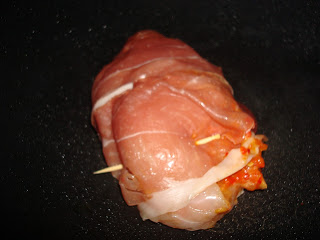
  3. Thread onto soaked skewers and grill for 5 minutes on the barbeque turning frequently
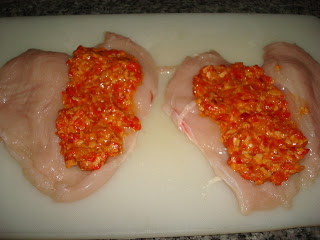
Chicken Skewers

  • 500 grams boneless chicken thigh fillets, cut into 2cm cubes
  • 2 tablespoons Tandoor Paste
  • 200mls coconut milk (or 200mls thick natural yoghurt)
  • juice of half a lemon
  • 1 clove of garlic, minced
  • 1 chilli, deseeded and chopped
  • 1/4 cup coriander leaves

Method
  1. Pop all of the ingredients except the chicken into a food processor and blitz until well combined.
  2. Marinate the chicken for at least an hour or overnight
  3. Thread onto soaked skewers and grill for 10 minutes, turning frequently

Banh Xeo - Crispy Rice Pancakes


One of my favourite Vietnamese snacks is Banh Xeo - a crispy Rice flour and coconut milk pancake, filled with chewy pork and prawns, fragrant fresh herbs like Thai basil, Vietnamese mint and coriander, and crunchy beansprouts. It's served with Nuoc Cham, the classic Vietnamese sauce, wonderfully sweet and sour with a pungent hint of fish sauce and a wallop of chillies.

I learnt how to make Banh Xeo in Hoi An in Vietnam, at a wonderful Vietnamese restaurant/cooking school Morning Glory. I had a private lesson with Mrs Vy the chef and learnt so much about Vietnamese cuisine. 'Xeo' means sizzling, and that's the sound you'll hear as the pancake batter goes into the pan. Traditionally these are sliced, popped onto lettuce leaves, and smothered in herbs, before wrapping the lettuce parcel up and dipping it in the sauce.

In Washington, I went shopping in a great little suburb called Georgetown and stumbled across a fabulous Vietnamese restaurant - their Banh Xeo didn't disappoint, and reminded me of how long it had been since I made them. So here I am, replicating another dish from my trip.

My version is a little different to the traditional way of preparing Banh Xeo. I add cornflour to the rice flour to make it firmer and less likely to break up, though even if they do break they taste fabulous anyway. I also fill the pancakes with everything including the herbs and serve with the dipping sauce, rather than slice it up, pop it onto lettuce leaves and put the herbs on top.

Here's one that didn't quite turn out right, but was delicious anyway.

For those in Doha, rice powder is the same as rice flour, and Vietnamese mint is hard to come by, I occasionally find it at Megamart, but use normal mint if it's not around.

Banh Xeo with Prawns and Pork

  • 2 cups rice flour
  • 3 tablespoons cornflour
  • 2 cups iced water
  • 400 mls coconut milk
  • 1 teaspoon turmeric
  • 1 teaspoon sugar
  • 1/2 teaspoon salt
  • 1/4 teaspoon white pepper
  • peanut oil to fry
  • 2 tablespoons mung bean paste (steamed mung beans ground to a paste with a little bit of water) optional
  • 1 cup beansprouts
  • 1/2 cup Thai basil
  • 1/2 cup Vietnamese mint leaves (normal mint is fine)
  • 1/2 cup chopped coriander
  • 300 grams pork, chopped fine and fried until crisp (I quite often use bacon)
  • 300 grams prawns, cooked and chopped
  • 1/2 cup chopped spring onions
  • 2 cups washed butter lettuce leaves
Nuoc Cham
  • 1/4 cup sugar
  • 1/2 cup hot water
  • 3 tablespoon lime juice (juice of a large lime)
  • 1/4 cup fish sauce
  • 1 clove garlic, minced
  • 1-2 bird’s eye chilies, cut into very fine rings
  • spring onion (optional)

Method

To make the Nuoc Cham, mixed all of the ingredients together and stir until sugar is dissolved, set aside to cool. You can add spring onions and/or coriander once cooled.


Make the pancake batter by mixing the rice flour, cornflour, salt, pepper, tumeric, water and coconut milk with a whisk until lump free. Cover and refrigerate for at least an hour, or overnight.


To make the pancakes, have everything chopped and ready to go. Heat a teaspoon of peanut oil in a small non-stick frying pan over medium to high heat, drizzle in a small ladleful of batter and swirl to coat the base (like you would a crepe). Listen closely and you'll hear the Xeo, it should sizzle away quite merrily.


Add in the pork and prawns, and cook for a minute or two. Check the bottom of the pancake, it should be lovely and golden and the top should be almost set.


Add in the spring onions.


Closely followed by the herbs and beansprouts.


Fold over carefully, and slide onto a plate to serve.


Cut into pieces, wrap each piece in lettuce and dip in Nuoc Cham sauce.


Chicken, Prosciutto and Sage Risotto


I'm back! I've been away in the US for a month travelling with hubby and the little chefs, and we had a great time. I am pleased to be back though - living out of a suitcase and seeing a new town each day or two is fantastic, but when the holiday is over, it's nice to come back to our own place, shampoo in the right spot, clothes hanging in the wardrobe, trampoline out the back, and buckets and buckets of Lego. AND my kitchen! oh how I've missed thee, I unashamedly stand up straight, my shoulders broad, hand on heart and say "I LOVE TO COOK!"

Whilst I didn't cook on holiday (short of stir frying a pack of frozen PF Chang's noodles - which were OK mostly), We ate out most nights in the States, and I found some real gems, so I'm going to try and re-create my version of the stars.

We started in Houston visiting friends, and I must say I had the very best smoked pork ribs ever at our friends house, I would try and re-create it, but SP had the most impressive smoker I'd ever seen, so I don't think I'd come close.

Our next stop was New York! It blew me away, more than I ever thought it would, who knew such a big touristy city had so much character, from amazing scenery in Central Park, awe inspiring views from the Empire State Building, fantastic drama and musical productions to shopping and most importantly, the fabulous New York people. We ate bagels at a lovely cafe each morning, had cheesecake most nights, we dined sans little chefs in the infamous gangster ridden (probably not now) suburb of Hells Kitchen at a lovely Italian restaurant. I had a wonderful asparagus, sage and prosciutto risotto. Hubby's not a fan of asparagus so to re-create it I made a chicken, leek, sage and prosciutto risotto - the sage and prosciutto are the heroes. It's a flavour combination that goes together so well.

So here's my version of the one I ate in New York.

Happy Cooking
Gill

Chicken, Sage and Prosciutto Risotto
  • 600 grams chicken breast, cut into 1cm slices
  • 1 medium leek, sliced finely
  • 1.5 litres chicken stock
  • 1 cup white wine (or water if cooking halal)
  • 1 tablespoon olive oil
  • 40 grams butter
  • 2 cloves minced garlic
  • 2 cups arborio rice
  • 1/2 cup grated Parmesan cheese
  • 1 tablespoon lemon juice
  • 3 tablespoons shredded sage
  • 6 rashers prosciutto

Method

1.   Heat the grill and place the prosciutto on an oven tray, grill for two minutes each side until the prosciutto is fairly crisp, it will crisp up a bit more on standing. Cool and crumble.


2.   Put the chicken stock in a pot and bring to a gentle simmer, keep simmering whilst cooking the risotto.  Stir fry the chicken and leek in the olive oil for 5 minutes until leek has softened and chicken is cooked, remove from the pan.


3.   Add the butter to the pan with the garlic, and fry for 1 minute and add the rice, stir to cook and stir fry for a few minutes for the rice to toast nicely in the butter and garlic.


4.   Add the wine and stir until the wine is absorbed. Add the hot stock, one ladle at a time, stirring constantly until each ladle is absorbed before adding the next. Keep adding, and stirring until the rice is tender. It will take about 20 to 25 minutes.


5.   Add the chicken and leeks back in, a squeeze of lemon and cook for a minute to warm the chicken, remove from heat, add the Parmesan and sage, stir and serve with the prosciutto crumbled over the top and top with some slivers of shaved Parmesan.

Homemade Vanilla Essence


I'm off on holiday tomorrow, and procrastinating about packing. So when there's something I don't want to do, I find an absolutely MUST, couldn't possibly not, how dire if I didn't thing to do in the kitchen. Today was easy. A lovely friend left Doha (not so lovely she left) and gave me her stash of Vanilla Beans.


They are heavenly and I racked my brains thinking about how best to use them to maximise their gorgeous gorgeous flavour. So I decided on Vanilla Essence (Extract for you American folk), for one thing we can't get the real stuff here - has alcohol in it, which is by and large taboo, unless you have a permit and shop at the one and only alcohol store. Whilst they stock alcohol, they don't stock vanilla essence. So I trotted on down, bought me a bottle of vodka and set to turning these delicious little numbers into Extract. Bear in mind that was 8 weeks ago, and today I decided to pop it into bottles to give as gifts (that was the MUST do in the kitchen thing).

Home made Vanilla Essence (Vanilla Extract)

  • 1 litre vodka
  • 10 - 15 whole vanilla beans (I used 10, next time I would definately use 15)

Method

Not too tricky really, slice the vanilla beans in half lengthwise and scrap out the seeds (I only scraped some of the seeds out, not all, but I think it would benefit from all of the seeds). Pop the seeds and the pods into a glass jar.


Cover with vodka and give a little shake.


Set aside in a dark cupboard for 8 weeks, shaking the bottle twice a week if you remember. Pop into bottles, add a vanilla bean to each bottle and share the joy with your friends. I popped 2 vanilla beans into each bottle so that when the bottle gets half way through it can be topped up with vodka, shaken and used a week or two later. It's the gift that keeps on going.

Here's a photo of the back of the bottle showing the colour of the vanilla essence. It could easily go a shade or two darker.


Bircher Muesli


This is my version of Bircher Muesli, it isn't the prettiest dish in the world, but it is easy and tasty and a fabulous way to start the day. The recipe makes enough for 2 or 3 servings and will keep in the fridge for 3 days. Bircher Muesli is one of those dishes that changes each time I make it, in this version I've used apple and cinnamon, but you can pretty much make any flavour you like - my favourites include mango & almond, and raspberries & sunflower seeds. I've used rolled oats as the base, but it's more commonly made with a good quality muesli. It's a great recipe for healthy alternatives as well, I'm off dairy at the moment so used goats milk yoghurt and rice milk. I strained the yoghurt in muslin for a few hours to drain out the liquid and leave me with a lovely thick greek style yoghurt.

If you're feeling organised, mix it then pop it into the fridge in jars. Great for taking to work as a mid morning energy boost.

Simple Bircher Muesli
  • 1 cup rolled oats or good quality muesli
  • 2/3 cup milk (you can use low fat)
  • 1 cup yoghurt (greek if you can get it)
  • 1/2 teaspoon cinnamon
  • 1/4 teaspoon nutmeg (optional)
  • 2 teaspoons honey or agave nectar
  • 1/2 cup unsweetened apple sauce
  • 1 grated apple

Method
  1. If you aren't using Greek yoghurt then drain the yoghurt in a muslin-lined sieve over a bowl for a few hours until it is nice and thick.
  2. If you don't have apple sauce, peel, core and slice two apples and put in a pot, just cover with water and cook for 10 minutes until tender. Blend apple slices with some of the cooking liquid to make the apple sauce. Cool before using.
  3. Mix all of the ingredients except the grated apple - taste and add more honey if required. Pop into the fridge overnight.
  4. The next day, grate the apple and add to the muesli and serve. I also added some fresh apple slices on top and a sprinkle of toasted coconut (because I had it in the cupboard), and it was delicious.

Roast Red Pepper and Goats Cheese Dip

When it comes to dips I tend to be a one track pony.


This dip is one I roll out regularly (that and my spinach and smoked feta dip). It's delicious, and teamed with some easy pita chips, it's always been a crowd pleaser.  There are a few steps to the dip, but if you're a girly-swot like me in the kitchen, you're bound to have a bag of frozen roasted peppers lurking in the freezer :) seriously though...I buy them when they're cheap, roast them off, peel them and pop them into a large plastic bag, flat in the freezer. This means the peppers are free flow and you can grab a handful out at a time. Great for salads, pastas or in this case...Dip. Alternatively keep a jar of store bought roast peppers in the cupboard. The goats cheese adds a lovely tartness to the dip, but on more than one occasion I've forgotten to put it in and the dip still turns out well, just up the anti a bit on the lemon juice to offset the sweetness of the peppers and the cream cheese.

Roast Red Pepper and Goats Cheese Dip

  • 2 large or 3 medium red bell peppers (capsicum) - this time I used one red and one yellow.
  • 200 grams cream cheese
  • 100 grams sour cream
  • 60 grams crumbled goats cheese
  • 2 teaspoons lemon juice
  • pinch white pepper
  • pinch salt
  • 1 clove garlic, crushed
  • Pita or Arabic Bread
  • Oil spray
  • your favourite seasoning - I like garlic salt, or italian blend herb seasoning mixed with sea salt

Method

Roast the peppers


Cut the peppers into quarters, removing the seeds and membrane, pop skin side up in a roasting pan under the grill and cook until starting to blacken. Put into a bowl, cover with plastic wrap and leave to cool. Once cool, peel the skin off the peppers and discard the skins.


Making the dip
  1. Put the red peppers, lemon juice and garlic into a food processor or blender and blitz until it's as smooth as you can get it.
  2. Add the cream cheese, goats cheese and sour cream and blend until combined. Season with the salt and pepper, and add more lemon juice if required.

Making the Pita Chips
  1. Pre-heat oven to 200 degrees celsius (400 degrees fahrenheit)
  2. Arabic bread has two layers, cut around the outside of the bread and peel the two layers apart.
  3. Spray each piece with oil spray and sprinkle with your favourite herbs and salt, or your favourite pre-mixed seasoning.
  4. Cut into triangles and bake for 3 to 4 minutes in the middle of the oven until brown and crisp. Be careful when baking, the difference between crisp and golden and in the bin black is a matter of seconds.

The pita chips will keep for 5 days in a sealed container, if they're a bit soft when you get them out, just pop them in a hot oven for 30 seconds to crisp up again. The dip will keep in the fridge for 3 days, unfortunately unlike most things I make, it isn't freezable, so you'll just have to scoff it all!

Kathi Kabab - Indian Chicken Paratha Wrap


I've never been to India! I want to, desperately, but will wait until the little chefs are a little bit older. I have lots of Indian friends and have enjoyed learning to cook with them. This dish, Kathi Kabab, was made for me many years ago by a good friend in NZ. I sorted through my recipes recently and found a piece of notepaper that she'd written her recipe on, smiled when I remembered the fun times we spent in the kitchen together, donned my Apron and thought I'd give it a whirl.

You can make your own paratha, but in this case I've used the frozen paratha you can buy readily in supermarkets and that worked fine.

Thanks Deepti for the memories and the recipe.

Kathi Kabab
  • 2 teaspoons coriander seeds, roasted in a dry pan and ground
  • 1 dried chilli, ground
  • 1/2 teaspoon ground turmeric
  • 1 teaspoon cumin seeds, roasted in a dry pan and ground
  • 1 teaspoon garam masala
  • 3 tablespoons ghee
  • 6 cloves garlic, crushed
  • 2 cm piece of ginger, grated
  • 2 medium tomatoes, chopped finely
  • 2 small green chillies, seeds removed, chopped finely
  • 3 tablespoons coriander leaves, chopped
  • 400 grams chicken breasts, cut into small 1cm cubes
  • oil for frying
  • 8 eggs, lightly beaten
  • 4 frozen parathas
Method
  1. Half cook the paratha, i.e. cook each side until half cooked, set aside
  2. Heat the ghee in a pan and fry the garlic and ginger over a medium heat until starting to soften, be careful not to burn the mixture. Add the chilli, ground coriander and cumin seeds, turmeric and garam masala and fry for a minute or two until fragrant.
  3. Add the tomatoes and cook for 7-8 minutes until the tomatoes start to turn into a pulp. Add the green chillies, half of the coriander leaves and the chicken. Stirfry for about 10 minutes until chicken is cooked. Set aside, and keep warm.
  4. Pour a little oil into a non-stick pan and add 1/4 of the egg mixture, swirl to cover the base of the pan. Pop a paratha on top. Cook for a minute or two to set the egg and then turn the paratha over and cook the base for another minute or two until it is cooked through.
  5. Place a quarter of the chicken mixture down the centre of the egg topped paratha, sprinkle with coriander and fold in half. Repeat with the remaining ingredients.
  6. This is great on it's own but Dee used to make a mint chutney to go on it. Simply, puree in a food processor - 2 cups mint leaves, 2 cups coriander leaves, 2 green chillies, 4 cloves of garlic, 2cm of ginger, a teaspoon of sugar, juice of a lime and a big pinch of salt.

Curry Laksa


I had a fabulous time last Sunday showing 14 ladies how to cook curries from different parts of the world. We cooked an Indian chicken curry, a Sri Lankan lamb curry, a green prawn curry from Thailand and finally a Curry Laksa from Malaysia.


No surprise to me because I love Malay food...the winner on the day was the Curry Laksa. Malaysian food is a lovely blend of the different cultures who live there, Indians, Chinese and native Malay and a curry laksa showcases all the amazing flavours typical in Malaysian cuisine. The flavours hot, sour, salty and sweet are similar to other South Eastern Asian cuisines; the difference is the depth!

Malaysian curries for example benefit from a chile paste that can take an hour or two of simmering for the flavours to amalgamate into something stunning.

The laksa gets it's depth of flavour from a rich chile paste, laden with shrimp paste, dried shrimp, ginger and lemongrass. The sweetness comes from the coconut milk and palm sugar, the salty - from the shrimp paste and the sour from the lemongrass and lime leaves that expertly cut across the richness of the creamy coconut broth.

This Laksa isn't a 30 minute dinner, but it can be if you prepare the chile paste in advance and freeze.


Curry Laksa (Curry Mee)

Chilli paste
  • 200 grams red onions
  • 200 grams red chillies1
  • 100 grams lemongrass (inside white pieces only)
  • 50 grams galangal
  • 50 grams dried shrimp
  • 50 gram shrimp paste – cooked in dry pan for 1 min to release flavours
  • oil

Blend with oil into a fine paste, saute slowly 1 – 2 hours until until colour changes and oil comes out of mixture, add 3 lime leaves, chopped finely
 
The secret to the chile paste is to saute it until the oils are released and the colour darkens considerably. It will take anything from an hour to 2 hours.
 from this...


to this...


Laksa Paste
  • 100g shallots chopped 
  • 4 cloves garlic
  • 2 inch piece of galangal (or ginger if no galangal)
  • 3 tablespoons coriander seeds
  • 4 tablespoons chilli paste
  • 2 tablespoons sliced lemon grass
  • 10 peppercorns
  • 3 candlenuts (or macadamias)
  • 1 teaspoon shrimp paste 

Grind all to a fine paste in a food processor or mortar and pestle.

Laksa
  • 200 grams prawns, peeled and deveined
  • 200 grams fried tofu cubes or tofu steak, cut into pieces
  • 300 grams shredded, cooked chicken meat
  • 300 grams blanched bean sprouts
  • 600 grams blanched yellow noodles
  • 300 grams blanched rice noodles
  • 4 eggs, hard boiled and cut in half
  • 3 cups coconut milk
  • 2 cups chicken or fish stock
  • 1 – 2 tablespoons palm sugar
  • 1 tablespoon salt, or to taste
  • shredded lime leaves
  • fish sauce to taste

Method
  1. Heat 3 tablespoons oil and saute laksa paste until fragrant (3 minutes)
  2. Add coconut milk, stock, sugar and fish sauce and salt (to taste) and bring to a low boil
  3. Add chicken and prawns and boil slowly until prawns are cooked (about 3 minutes)
  4. Add tofu and cook a further minute
  5. Place noodles in bowls and pop beansprouts, tofu, eggs, prawns and chicken on top of noodles and ladle soup on top. Garnish with coriander leaves and chopped spring onions.  Serve with roti bread or paratha, and extra chili paste.

Watermelon and Pomegranate Granita


It's hot! really really hot! this week the temperature has been in the high 40's. Summer is most definately here. Friends who aren't in Doha often ask me what 50 degrees feels like - I say turn the oven on to 50 degrees, let it heat up and open the door. That's what it feels like when you head out of the door in Doha. The thing is, you get used to it and learn to spend more time indoors or at the pool. It's also a great excuse to make some cooling summer concoctions. So this week I made a tasty, vitamin and anti-oxidant rich granita with two of my favourite fruits; watermelon and pomegranate.

Granita is similar to sorbet, it's chunkier and has lots of lovely crunchy ice crystals to munch on (with sorbet you blend the frozen mixture halfway through freezing). This recipe uses Pomegranate juice which is readily available, but I prefer to make my own especially when I only need a small amount. To make 3 tablespoons of juice, pop 1/2 cup pomegranate seeds into a mesh sieve, over a bowl (to collect the juice) and smash with the back of the spoon, stirring the mushy mixture to release the juice.

The recipe is very kid friendly, but I have in the past made it for a dinner party with a splash of tequila and cointreau in it.

I have some friends who follow a mostly raw diet so if they see this , I suggest they replace the water and sugar in the recipe with 1/3 cup agave nectar, which then means it won't need heating (let me know how it turns out).

Watermelon and Pomegranate Granita
  • 1/3 cup sugar
  • 3 tablespoons pomegranate juice
  • 3 tablespoons water
  • 5 cups of watermelon, de-seeded and chopped into rough chunks
  • juice of a lime

Method
  1. Bring the sugar, pomegranate juice and water to boil stirring to dissolve the sugar, set aside to cool down.
  2. Process the watermelon and lime juice in a blender until smooth (you'll need to do this in two batches).
  3. Return all of the watermelon mixture to the blender, add the pomegranate/sugar mixture and blend well. Pass through a fine mesh sieve to remove any lumps, and pour into a 20cm by 30cm oblong glass or ceramic dish.
  4. Put into the freezer and every 30 minutes, stir and scrap the mixture with a fork. After about 3 hours you will have a crumbly, crunchy granita. This will be ok covered in the freezer for 2 to 3 days. Serve garnished with some extra pomegranate seeds.

Bagels


I love waking up on Friday mornings (the start of the weekend in Qatar) and knowing there's not much to do but hang with the little chefs. The most energetic we get is to pop over to the pool for an hour or so. Lately, I've been baking a lot on Fridays, so today I'm boiling and baking bagels. I'll prepare the dough and let it rise while we're swimming and an hour or so after we get home we'll be sitting down to the heavenly smell and delicious taste of New York style bagels.

The beauty of bagels is that you can play around with the flavours depending on what kind of mood you're in. I like to top my bagels with sesame seeds or sunflower seeds. I quite often make them with chapati flour, which is an indian unrefined flour for a healthier version. And if I'm in a sweet mood I'll make them with mixed spice, cinnamon and some raisins (they're delicious topped with cream cheese).
 
Try these, you'll be amazed how easy they are to make.

New York Style Bagels

  • 2 teaspoons of dry yeast
  • 1 tablespoon of sugar
  • 1 1/4 cups of warm water, you may need a little more
  • 3 ½ cups (500g) of bread flour, you can use plain flour, but they won't be quite as chewy
  • 1 teaspoon of salt

Method

Mix the water, sugar and yeast together and let it sit for a few minutes until frothy.

Put the flour and salt in a mixer with a dough hook (if you're lucky enough to have one), or into a bowl, add the yeast mixture and bring together, add more water if the mixture seems too dry. Knead, with the dough hook, or on a floured surface for 10 minutes until smooth and elastic.


Put into an oiled bowl and cover with plastic wrap, leave for an hour to rise (the dough should double in size). Punch the dough down and let it rest for 15 minutes.


Divide the dough into 12 balls. To make smooth even balls, cup the ball of dough in your hand and roll it around the work surface, gently pulling the dough into itself as you roll.


Poke a whole in the middle of each ball and while stretching the hole shape the bagel into a 'bagel shape'. Put onto an oiled baking tray, cover with a damp tea towel and rest for 15 minutes.


Heat the oven to 210 degrees celcius (425 degrees fahrenheit)

Bring a large pot of water to the boil and put the bagels in 3 or 4 at at time and boil for 2 minutes on each side. Remove and drain. If you want to top the bagels with toppings, brush with beaten egg yolk and water (1 egg yolk + 1 tablespoon water) and dip into your topping of choice. Today I'm using sesame seeds for us and leaving them plain for the little chefs.


Place the bagels onto a greased baking tray and bake for 20 minutes until golden and cooked through.


My advice...slice one of them open, smother in butter and scoff. There is nothing quite so tasty as a freshly baked bagel, hot out of the oven.

Red Curry Fish Cakes


I love Asian food - just in case you hadn't noticed. I love Asian flavours - crisp, fresh, fragrant and clean. I don't take a bite of a SE Asian dish and have to think and analyse what 20 odd ingredients have gone into my mouthful. One of the reasons I love Thai food is it's pure simplicity, and the combination of flavours are traditional and make sense...

ingredients that grow together - go together!

I catered a friends birthday party recently and these Thai fish cakes barely made it out of the kitchen, teamed with a tomato chile jam, they were a hit. They also make a fabulous midweek dinner combined with a simple salad.

For my Doha friends, Thai Basil is available at Megamart, they get their Asian vegetables in on a Thursda, so Friday is a great time to shop. It's sold by weight, so don't be afraid to to open the bag and pull out a small handful of leaves.

Thai Fish Cakes

Use the freshest fish you can in this, and change around the flavours to suit what you have and what you like.The fishcakes are moderately (popularly) spicy, if you like extra spice, add in some chopped chile.

  • 500 grams firm boneless white fish, chopped into bite sized pieces
  • 2 teaspoons red curry paste
  • 1 teaspoon cornflour
  • 2 spring onions, chopped finely
  • 1/4 cup thai basil chopped finely
  • 1/4 cup coriander leaves, chopped finely
  • 1 clove garlic, chopped finely
  • 1/3 cup coconut milk
  • juice of half a lime
  • 1 teaspoon sugar
  • oil for shallow frying, or a spray of oil to bake in the oven


Method
  1. Combine the ingredients in a food processor and pulse until the ingredients come together but you can still see lovely lumps of fish. Alternatively, chop fish finely and combine with the rest of the ingredients.
  2. Form the mixture into 3cm balls - the mixture will be sticky, so use wet hands to form the mixture into balls. Flatten.
  3. Either cook in an oven at 400 degrees fahrenheit (200 degrees celcius) for 10 minutes, turning once during cooking, or heat 1cm vegetable oil in a frying pan on moderate heat, and fry the fishcakes for 2 minutes, then turn over and fry for 2 minutes more.
  4. Drain and serve.

Foccacia Bread


We had friends over for a barbeque last week and to complement the grilled meats and salads I'd put together, I made fresh foccacia bread. Served warm straight from the oven, it was a fabulous complement, delicately fragrant, and deliciously tasty. I can and have eaten a half loaf of this bread standing in the kitchen having just pulled it out of the oven.

You can top a foccacia bread with whatever toppings you fancy - olive oil, is of course, compulsary. I'm a big fan of coarse sea salt and fresh rosemary, and if I'm organised, I roast a garlic bulb in the oven while the bread is cooking and then squeeze the garlic all over the freshly baked hot bread - yummmmm!

Foccacia Bread

  • 2 teaspoons dried yeast
  • 1 cup warm water
  • 1 tablespoon sugar
  • 3 1/2 cups flour (plus extra if needed)
  • 1/2 teaspoon salt
  • 1/4 cup olive oil

  • Topping
  •  1 tablespoon finely chopped fresh rosemary
  •  1 tablespoon coarse sea salt
  • olive oil to drizzle (about 2 tablespoons)

  • Method

    1. Mix the warm water and sugar together, sprinkle yeast on top and stir briefly. Set aside for 5 minutes until yeast is activated and starting to froth.
    2. In a bowl, mix together flour and salt, add olive oil and yeast mixture and stir together. Turn onto a floured bench and pull together and start to knead. Add more flour if the mixture is too sticky. Knead for 10 minutes until smooth and elastic. (I'm going to be honest, I pop mine into my mixer with a dough hook and let it do the kneading for 10 minutes)
    3. Pop the dough into an oiled bowl, cover with plastic wrap, and leave for 1 hour in a warm place to rise.
    4. Punch the dough down, roll into a oblong, pop onto a baking tray and stretch to fit the tray, poke holes in the dough and drizzle with olive oil, sprinkle sea salt and rosemary over the top and leave to rise for 15 minutes.
    5. Bake at 200 degrees celcius (400 degrees fahrenheit) for 15 to 20 minutes until golden. Serve warm if possible.

    Thai Prawn & Pomelo Salad


    I love Pomelo, a big fat green citrus fruit with pink flesh. It is close to a grapefruit in taste, but is sweeter and drier in texture, and it is amazing in salads as it soaks up the flavours of the sauces and herbs really well.


    Hubby though is not a fan, so I don't get to make this salad often. I had a more adventurous friend coming over for lunch so I took the opportunity to make it.

    In Thailand this salad is called Yam Som-O. I have played around with the ingredients so much over the years that I'm sure this varies from the traditional salad, but it still tastes great.

    The combination of fresh herbs, sweet sugar and coconut, sour lime and tamarind, the spicy red chillies and the chewy texture of the prawns and pomelo create a stunning dish both in flavour and looks.

    I like to serve this salad warm, but it is equally nice served at room temperature - everything can be prepared in advance and combined at the last minute before serving, just take the prawns out of the fridge 15 minutes before serving to come to room temperature.

    You can also make this salad with crabmeat if you don't fancy prawns.


    Prawn and Pomelo Salad
    (serves 4 as an appetiser)
    • 300 grams prawns, peeled and deveined
    • 20 grams dried shrimp, crushed (optional)
    • 1 medium pomelo, pith removed and shredded
    • 1/2 cup coriander leaves
    • 1 or 2 red chillies, de-seeded and sliced
    • 2 shallots, sliced (or 2 spring onions, sliced)
    • 2 tablespoons dessicated coconut, toasted in a dry pan to golden brown
    Dressing
    • 100 mls tamarind concentrate
    • 40 grams palm sugar (or brown sugar if you don't have palm sugar)
    • 1/2 teaspoon salt
    • 30 mls lime juice (juice of 2 or 3 limes)

    Method
    1. Soak the shallot slices in water for 5 minutes (this removes the pungent onion taste), drain well.
    2. Put the dressing ingredients into a pot, and bring to the boil, stir until sugar has dissolved and then simmer gently for 3 minutes to thicken. Set aside to cool.
    3. Bring a pot of water to the boil and add the prawns, poach for a minute or two until they are opaque and pink. Leave to cool if you want to serve your salad cold.
    4. Combine prawns, dried shrimp, pomelo, shallots and coconut
    5. Add dressing to taste, it will not need all of the dressing. Serve on individual plates and sprinkle with coriander and chillies.

    Hot Cross Buns


    I know, I know, it's a bit late for an Easter recipe, but it was the first time I'd ever made these gems, they tasted fabulous, and look so scrumptious, that I just couldn't resist sharing the recipe.

    I woke up one morning and quite fancied a hot cross bun (as you do around Easter time). Unfortunately the only two places in Doha I'd found that made them, made a very poor rendition - too bready, not enough fruit or spices, and the deal-breaker...no rich sticky sweet glaze.

    So I googled and found a fabulous recipe on taste.com.au and gave them a whirl. I didn't have mixed spice, so I made my own - mix together 1 teaspoon ground allspice, 3/4 teaspoon ground cinnamon, 1 teaspoon ground cloves, 1 1/4 teaspoon ground ginger, 3/4 teaspoon ground nutmeg and a pinch of ground black pepper.

    I've just made a batch of the dough and it's happily rising on the bench, I'll just leave off the cross and have them as plain fruit buns instead.

    Hot Cross Buns

  • 1 tablespoon dried yeast
  • 1 teaspoon sugar
  • 185ml (3/4 cup) warm milk
  • 125ml (1/2 cup) cold milk
  • 50g butter, melted
  • 1 egg, lightly whisked
  • 525g (3 1/2 cups) plain flour
  • 200g mixed dried fruit (I used sultanas, currants and some mixed peel) 
  • 70g (1/3 cup) caster sugar
  • 2 teaspoons mixed spice
  • 1/2 teaspoon cinnamon 
  • A pinch of salt
  • Flour paste - 1/2 cup plain flour + 75mls water
  • Glaze - 1/3 cup water + 2 tablespoons caster sugar 


  • Method
    1. Whisk yeast, sugar and the 3/4 cup of warm milk in a jug. Set aside for 10 minutes or until frothy. Whisk in the 1/2 cup of cold milk, butter and egg. Combine flour, dried fruit, sugar, mixed spice and salt in a bowl. Make a well in the centre. Add the yeast mixture. Stir to combine, and turn out onto a lightly floured surface and knead for 10-15 minutes or until smooth and elastic. Or like me, let the mixer and dough hook do the work.
    2. Place in a greased bowl. Cover with plastic wrap. Set aside to rise for an hour or two in a warm place until doubled in size.
    3. Punch down the centre of the dough with your fist. Knead on a lightly floured surface for 2 minutes. Shape into 12 even portions. Brush a baking tray with melted butter. Place portions side by side in the prepared pan.
    4. Cover with a clean tea towel. Set aside for 30 minutes, buns will have risen and almost joined together.
    5. Preheat oven to 190°C. Combine flour and water to make a paste. Place in a sealable plastic bag. Cut 1 corner from the bag to make a 2mm hole. Pipe crosses onto the buns.
    6. Bake for 20 to 25 minutes until golden and cooked through.
    7. Heat sugar and water in a saucepan over low heat until the sugar dissolves. Simmer gently until the glaze thickens (about 5 minutes).
    8. Transfer buns to a wire rack and brush tops with hot glaze.
    9. Serve warm, smothered in butter.
    After first rising

    After second rising

    After baking and glazing

    Iced Cookies


    February was a busy month for me cookie making. Generally I'm not a big baker, but I do like to create, and baking for friends is great fun. I'm not an expert, there are plenty of people who are - if you start googling iced cookies you will be amazed what you'll see. I'm a rank amateur compared to most, but I enjoy looking at the finished product and thinking "I did that!"


    I also bought a heat gun, one that strips wallpaper, or in my case dries icing faster. Hubby despairs of me, just when he thought I had every single kitchen gadget you could ever own, I buy a power tool. It's quite cool actually, I can feel the testosterone surging when I switch it on - I think he's just jealous.

    The cookie recipe I use is so easy to use. You can re-roll the leftover dough pieces until the very last cookie is cut, and the dough freezes in it's 'raw' state. You can also freeze the cooked iced and un-iced cookies.


    The icing recipe I use is from http://sweetopia.net and tastes fabulous, you can adjust the consistency depending on how you want to decorate the cookies. I pipe by outlines on with an icing bag and when they set pipe a slightly runnier version of the icing in the middle which results in a nice smooth cookie. You can spread the icing on with a knife or dip the cookies in the icing if you prefer. It uses meringue powder, for those in Doha, I buy egg white powder from Lulu's - also I sift the icing sugar here twice to get rid of all the lumps. You can also pipe the icing onto baking parchment to make cupcake toppers (like the wee birds above), just pipe lots of extra ones, as they're fragile and break easily.


    Sugar Cookies
    • 2 cups sugar
    • 350 grams butter, softened
    • 4 eggs
    • 1 teaspoon vanilla essence
    • 2 teaspoons baking powder
    • 5 cups flour
    • 1/2 teaspoon salt
    Method
    1. Cream the butter and sugar together until light and fluffy, add in the eggs one at a time, beating well before adding the next one. Beat in the vanilla essence
    2. Sift the dry ingredients together and add to the wet mixture. Mix well. Pop dough into the fridge for at least half and hour to firm up
    3. Heat the oven to 190 degrees celcius (375 degrees fahrenheit).
    4. Line a baking tray with baking paper, roll out the dough to 1/2 centimetre thick and cut into shapes with a cookie cutter, place on the baking try and bake for about 6 -7 minutes until golden brown on the bottom and starting to colour on the top. Watch carefully as the difference btetween cooked and burnt is less than a minute.
    5. Take out and leave on the baking tray to cook a little bit more (or pop straight onto a cooling rack if they're already golden brown). Cool on a rack, and ice or freeze.


    Royal Icing for Cookies
    • 180 mls warm water
    • 5 tablespoons meringue powder (I use egg white powder)
    • 1 teaspoon cream of tartar
    • 1 kilo icing sugar, sifted twice
    Method
    1. Mix the warm water and meringue powder together in the bowl of a mixer and whisk by hand for 30 seconds, add the cream of tartar and whisk for another 30 seconds.
    2. Add in all of the icing sugar (I mix by hand here to incorporate it, otherwise the mixer sends the icing sugar flying and my kitchen looks like it's been snowing)
    3. Using the mixer on the lowest speed, beat the meringue for 10 minutes until thick and glossy.
    4. Thin the mixture to the consistency you like by adding a teaspoon of water at a time and beat.
    5. Tint with icing colours and pipe, spread or dip onto the cookies. Let set and then scoff! or package up for gifts.

    Braised Lamb Shanks with Rosemary and Red Wine


    I started a new job this week so in my determination to be organised I cleaned out the freezer. Lurking in the back were some lamb shanks I'd forgotten about. Lamb Shanks are one of my favourite cuts of lamb - they have such a lovely earthy flavour, and cooked well - slowly, on a low heat for a few hours, they'll be tender and delicate and loaded with the flavours you cook them with.

    In my case I love pairing lamb with rosemary, it's one of those flavour combinations that just works. I also popped in some garlic, a good dollop of red wine and some beef stock. Simple comforting flavours and a hearty rich sauce that works well with garlicky mashed potatoes or like me, serve it with a baked pumpkin.


    Braised Lamb Shanks with Red Wine and Rosemary

    • 1 tablespoon olive oil
    • 2 cloves of garlic, minced
    • 1 medium onion, sliced finely
    • 2 carrots, peeled and sliced
    • 3 fresh tomatoes, chopped finely, or 200 grams canned tomatoes
    • 4 medium lamb shanks
    • 2 tablespoons flour
    • 100 mls red wine
    • 500 mls beef stock
    • 1 tablespoon chopped fresh rosemary
    • 1 tablespoon chopped fresh thyme
    • salt and black pepper to taste

    Method


    1. Sprinkle the lamb shanks with flour and brown in 1 tablespoon olive oil over a medium heat until browned all over. Set aside.
    2. Tip off most of the oil from the pan. To the remaining oil add the minced garlic and onions and fry over a medium low heat until onions are soft (about 3 minutes). Add in the tomatoes and red wine and cook for 5 minutes until it resembles a sauce. Add thyme, rosemary and beef stock, season with some salt and pepper.
    3. Add in beef stock and carrots.
    4. Put lamb shanks into an oven dish, cover, pour sauce over the top and bake at 160 degree celsius (300 degrees fahrenheit) for 2 and a half hours, stirring occasionally.
    5. Remove lamb shanks from pan, and thicken sauce with cornflour and water mixture.

    Bacon and Egg Pie


    I grew up in a house of 8, so spending lots of time in the kitchen preparing dinner wasn't a luxury mum had (apart from desserts, love love love her desserts, and preserving - amazing what you can preserve), so dinner fare was pretty basic. We never ever turned our nose up at this traditional New Zealand favourite - it's simple to make, filling and tastes divine. We used to pop a wedge of it on a plate, smother with 'Watties Tomato Sauce' (tomato ketchup for you american folk), and pile the plate high with salad. We also had it many times cold for picnics. Every time I make (and eat) a bacon and egg pie, it brings back so many wonderful, nostalgic memories of family times.

    Hubby too, is a big fan of bacon and egg pies, and because he's adamantly against Valentines Day, I couldn't resist making him a pie in a heart shape cake tin just for today :)

    The recipe below is my basic recipe (don't say I didn't warn you, it is seriously basic), but I often add extras like cheese, spring onions, potatoes and peas, so experiment with the flavours you like.


    Basic NZ Bacon and Egg Pie
    • 300 grams good quality bacon, cut into 1 inch pieces
    • 8 large free range eggs
    • 400 grams puff pastry
    • salt and pepper to taste
    • 1 egg yolk beaten with 2 tablespoons water
    Method
    1. Grease a deep dish pie tin well with butter. Roll out two thirds of the pastry and line the pie tin
    2. Spread half the bacon on top of the pastry,
    3. Break the eggs into the pie on top of the bacon and break the yolks, gently swirling the yolk and white together. Season with salt and pepper and top with remaining bacon.
    4. Roll out the remaining pastry and place on top of the pie, crimp the edges of the pastry together.
    5. Brush the beaten egg mixture over the top, cut a couple of holes in the lid of the pastry and bake at 180 degrees celsius (350 degrees fahrenheit) for 40 to 50 minutes until cooked through and golden on top.
    6. Serve with a decent dollop of tomato sauce and a green salad

    Vanilla Caramels with Sea Salt


    It's school holidays which means lots of time in the kitchen with the little chefs. Yesterday we whipped up a batch of my favourite caramels - the recipe contains sea salt so I thought it would be fun (and pretty) to pop some on top. These would make fabulous gifts, wrapped individually in wax paper and popped into a decorative box.

    When you're making the caramel you can use a candy thermometer if you've got one - I don't, so I just use the 'softball' method - which means popping a drop of the mixture into very cold water and the caramel is ready when you can roll the drop into a soft ball.


    Vanilla Caramels with Sea Salt
    • 1/3 cup unsalted butter, chopped
    • 1 cup cream
    • 1/2 teaspoon pure vanilla essence
    • 1 vanilla bean, split and scraped
    • 1 teaspoon sea salt
    • 1 1/2 cups white sugar
    • 1/4 cup golden syrup
    • 1/4 cup water
    Method
    1. Bring butter, cream, vanilla essence, vanilla bean and salt to a boil in a pan, set aside to cool
    2. Line a 20cm baking tin with baking paper and butter the paper
    3. Boil sugar, syrup and water in a large heavy bottom pan until sugar is dissolved, don't stir at this stage, just swirl mixture until sugar dissolves. Cook until a light caramel colour
    4. Remove pod from the cream mixture and carefully stir into to the caramel mixture, it will splatter and is scalding hot, so be very careful (this is one job the little chefs didn't get to do)
    5. Simmer gently, stirring occasionally until the mixture is at soft ball stage - this can take anything from 20 minutes to 40 minutes, so I start testing the caramel at 15 minutes. It's trial and error, if it's too soft the mixture won't set properly (but you can pop it back into the pan and try again), if it's too hard, it will still taste fabulous, it will just be less chewy than intended
    6. Once ready pour the caramel into the baking tin, sprinkle with sea salt and leave until completely cold, cut into 2cm squares

    Chicken with Thai Basil and Chillies


    One of my favourite Thai dishes is Gai Pad Kra-Pao - chicken stir fried with thai basil and chillies. I love the aniseedy sweet taste of thai basil, it's deep rich colour, and nose wrinkling fragrance. The traditional Gai Pad Kra-Pao is quite simply flavoured with lashings of fish sauce, buckets of garlic and a good wallop of chili.

    In my house, fish sauce is something that is met with an upturned nose and an adamant refusal to eat whatever it is I'm cooking (and that's just hubby - I haven't tried the little chefs on it yet), so I relent in this dish and use oyster sauce and soy sauce for the saltiness instead. I also like to add a decent dollop of minced ginger, because it really enhances the other flavours in the dish, and I throw in a handful of chopped spring onions. What results is something vaguely resembling the original dish, and full of the flavours we love. Just as a note, I add the chillies last after I've already dished out the little chefs meals.


    You can use Thai holy basil for this, but I prefer Thai Sweet Basil, it has rich green leaves on purple stems. For those in Doha, you can find it in Megamart - they receive their Asian vegetables on a Thursday afternoon so Friday morning is a great time to buy it.

    There is no substitute for Thai Basil, so if you can't find it, save this recipe for another day. If you have Thai Basil left over, take it off the stems lay it on tissue paper or kitchen towel, roll it up, pop into a plastic bag and freeze to use in thai curries.

    Chicken with Thai Basil and Chillies

    • 2 tablespoons oyster sauce
    • 2 tablespoons soy sauce
    • 1/2 teaspoon sugar
    • 3 cloves of garlic, minced
    • 3cm piece of ginger, minced
    • 500 grams minced chicken
    • 1/2 cup finely chopped spring onions
    • 1 cup lightly packed thai basil leaves
    • 1/2 red capsicum finely chopped
    • 2 thai chillies, deseeded and finely chopped (use more or less to taste)
    • 1 tablespoon peanut or vegetable oil

    Method
    1. Put the oil, garlic and ginger in a wok and heat over a high heat. When the garlic and ginger are sizzling add the chicken and stir until cooked.
    2. Add the spring onions and capsicum and fry for a few minutes more.
    3. Combine the sauces and sugar and add to the pan, stirring to coat, add in the chopped chillies and thai basil and cook for a minute until the basil is wilted. 
    4. Taste. Add more chillies and sugar if required.
    5. Serve over steamed rice.

    Leftover Proscuitto?


    To be honest, that title wouldn't normally headline the first post of a new year, but in Doha it's a bit of a novelty. Pork arrived early December in the form of bacon and sausages - not great quality but it still oinked so we got pretty excited. Proscuitto has arrived in the last couple of weeks, and it is good, seriously, seriously good! I crisped up the first batch to add to an avocado, sundried tomato and pine nut salad, and the leftovers I used to wrap some chicken stuffed with my favourite red capsicum pesto. It came out of the oven deliciously moist and decadently crisp with a lovely spicy nutty capsicum filling - I mainly use this filling as a dip, it's fabulous with fresh crusty bread - I had some leftover so thought I would try it with the chicken breasts and it was fabulous.

     
    Proscuitto Wrapped Chicken Breast stuffed with Spicy Red Capsicum Pesto
    (serves two)

    I use the term red peppers and capsicum side by side here to cater to my American and English and Oz/Kiwi friends. Basically it's the big fat not hot red peppers/capsicum about the size of an orange.

    • 2 chicken breasts
    • 4 slices proscuitto
    • 4 tablespoons red capsicum pesto

    Red capsicum and walnut pesto
    (makes 1/2 cup)

    • 2 red peppers, quartered and deveined and deseeded
    • 1/2 medium red onion, chopped finely
    • 1/2 cup walnuts (or pine nuts) chopped roughly
    • 1/4 cup olive oil
    • 1/2 teaspoon crushed chile flakes
    • 2 cloves garlic, minced
    • 2 teaspoons red wine vinegar

    Method

    1. To make the pesto, pop the capsicum skin side up under a grill and grill until the skin is mostly blackened. Remove from the heat, pop into a glass bowl, cover with plastic wrap and leave to steam and cool. Once cold, peel the skin off the peppers and chop finely.
    2. Heat a tablespoon of olive oil in a pan and stir fry the onions, garlic, walnuts and chile flakes for a few minutes until soft. Pop into a food processor with the capsicum, vinegar and remaining olive oil and blend till quite chunky.
    3. Butterfly the chicken breast - slice the chicken breast in half horizontally without cutting all the way through.
    4. Spread a tablespoon or two on top of the chicken breast.
    5. Fold in half and wrap in proscuitto, secure with toothpicks
    6. Bake for 20 to 25 minutes at 180 degrees celcius (350 degrees fahrenheit) until chicken is moist but cooked - pop a toothpick into the meatiest piece and when ready the juices will run clear.
    7. Serve over your favourite green, or in my case I served it over a lovely quinoa salad.